WiFi Pineapple Modules
Table of contents
- Introduction
- Module Development Overview
- Creating a Module
- Editing Module Properties
- Writing the Module Front End
- Writing the Module Back End
Introduction
WiFi Pineapple Mark VII Modules consist of two major pieces, a front-end and a back-end.
For the Mark VII, the front-end is written in Angular with Angular Material. For those familiar with WiFi Pineapple NANO and TETRA module development which used AngularJS, you will find the code to be similar for the most part, but with some new concepts introduced. It is recommended that you become familiar with with the basics of Angular, however the examples below should be fairly easy to follow.
The back-end can be written in almost any language you would like, however we will be using Python 3 in the examples below, because it has the most mature library and comes by default in the WiFi Pineapple Mark VII firmware.
To illustrate the full development process, this article will explain how to create a basic WiFi Pineapple Mark VII module that will send and receive data from a Python 3 back-end.
Module Development Overview
As mentioned in the introduction section, the front-end is written in Angular. Because of Angular’s differences from the previous generation AngularJS, the front-end is compiled from HTML, TypeScript and CSS into a single Universal Module Definition (UMD). This UMD file is then ingested by the WiFi Pineapple’s Web Interface and offers the user of your module interactive controls.
The back-end design has been further decoupled since the previous generation of the WiFi Pineapple, and it’s now easier to write your module back-end in a language that you prefer instead of PHP. We have developed a Python library to make module development much easier, with libraries for other languages in the pipeline.
When the user visits your module front-end, an API request is sent to the WiFi Pineapple server that will start the back-end. This process opens a Unix Domain Socket (UDS) that allows the WiFi Pineapple server to forward front-end module requests to your desired back-end, and send the back-end response back to the front-end.
Creating a Module
To start, make sure that you have python3, nodeJS and npm installed on your system. Then, fork the WiFi Pineapple Mark VII Modules git repository. Inside this repository, each module has it’s own folder which contains the source-code for the front-end and back-end.
The repository also contains a script called create.sh, which will guide you through module generation.
(mk7-modules) >> ./create.sh
__          ___ ______ _   _____ _                              _
\ \        / (_)  ____(_) |  __ (_)                            | |
 \ \  /\  / / _| |__   _  | |__) | _ __   ___  __ _ _ __  _ __ | | ___
  \ \/  \/ / | |  __| | | |  ___/ | '_ \ / _ \/ _` | '_ \| '_ \| |/ _ \
   \  /\  /  | | |    | | | |   | | | | |  __/ (_| | |_) | |_) | |  __/
    \/  \/   |_|_|    |_| |_|   |_|_| |_|\___|\__,_| .__/| .__/|_|\___| Mark 7
Module Creation Helper                             | |   | |
Version 1.0                                        |_|   |_|


[*] Module Name: MyModule
[*] Module Title: My Module
[*] Module Author: foxtrot
[*] Module Short Description: This is my first module!
[*] Creating New Module (TestModule).
[!] Would you like to prepare the Angular workspace? [Y/n] y
[*] Preparing the Angular workspace.
[*] Prepared the Angular workspace.
[*] A new module has been created! Exiting.
(mk7-modules) >>
Once you have generated your module, change directory into it and you’ll see the new Angular project that contains some skeleton code for the UI portion of your module.
There is also a helper script inside your new module directory named build.sh. This simple script will assist in building the module correctly for the WiFi Pineapple and can optionally package it for you.
(MyModule) >> ./build.sh
[*] Angular Build Succeeded
[*] Skipping Packaging (Run ./build.sh package to generate)
(MyModule) >>
Modules are packaged into a .tar.gz archive, which can be used to upload to the WiFi Pineapple through it’s Management UI.
Alternatively, developers can build their modules without the packaging step, and upload the entire dist/YourModuleName/ directory to to their WiFi Pineapple’s /pineapple/modules/ directory via SFTP, to speed up the development process.
Editing Module Properties
Each module contains a JSON file (projects/YourModuleName/src/module.json) that contains your module’s name, author, version and more.
───────┬────────────────────────────────────────────────────────────────────────────
       │ File: projects/MyModule/src/module.json
───────┼────────────────────────────────────────────────────────────────────────────
   1   │ {
   2   │     "name": "MyModule",
   3   │     "title": "My Module",
   4   │     "description": "This is my first module!",
   5   │     "version": "1.0",
   6   │     "author": "foxtrot"
   7   │ }
───────┴────────────────────────────────────────────────────────────────────────────
Note: It is important to bump your module’s version number for every release you submit to the WiFi Pineapple Mark VII Modules Repository.
Writing the Module Front End
For most people, the main directory of interest will be projects/YourModuleName/src. It contains the HTML, TypeScript and CSS for your module front-end, and will contain our back-end Python program too.
(src) >> ls
assets  lib  module.json  module.svg  public-api.ts
(src) >> ls assets/
README
(src) >> ls lib/
components  modules  MyModule.module.ts  services
(src) >>
Most editing will be done in the lib/components and lib/services directory. The components directory contains the Angular components that can be rendered in your module’s UI. The services directory contains services that your components can use to share data.
The assets directory contains files that will be installed alongside your module once it is packaged, such as configuration files, READMEs, etc.
By default, there is some boiler-plate example code in the lib/components/YourModuleName.* files.
──────┬────────────────────────────────────────────────────────────────────
      │ File: components/MyModule.component.html
──────┼────────────────────────────────────────────────────────────────────
  1   │ <mat-card>
  2   │     <mat-card-title>Welcome to MyModule</mat-card-title>
  3   │     <mat-card-content>
  4   │         This is the example module.
  5   │     </mat-card-content>
  6   │ </mat-card>
───────────────────────────────────────────────────────────────────────────
──────┬────────────────────────────────────────────────────────────────────
      │ File: components/MyModule.component.ts
──────┼────────────────────────────────────────────────────────────────────
  1   │ import { Component, OnInit } from '@angular/core';
  2   │ import { ApiService } from '../services/api.service';
  3   │
  4   │ @Component({
  5   │     selector: 'lib-MyModule',
  6   │     templateUrl: './MyModule.component.html',
  7   │     styleUrls: ['./MyModule.component.css']
  8   │ })
  9   │ export class MyModuleComponent implements OnInit {
 10   │     constructor(private API: ApiService) { }
 11   │
 12   │     ngOnInit() {
 13   │     }
 14   │ }
───────────────────────────────────────────────────────────────────────────
This boiler-plate code can be easily adapted to make an API request and display the output to the module’s HTML, by using the ApiService service. In this example, we will get the WiFi Pineapple’s firmware version from the internal ‘status’ API endpoint.
──────┬────────────────────────────────────────────────────────────────────
      │ File: components/MyModule.component.html
──────┼────────────────────────────────────────────────────────────────────
  1   │ <mat-card>
  2   │     <mat-card-title>Welcome to MyModule</mat-card-title>
  3   │     <mat-card-content>
  4   │         <button mat-flat-button color="accent"
  5   |                                (click)="doAPIAction();">
  6   │             Request to API
  7   │         </button>
  8   │         <br/>
  9   │         <span>The version is: </span>
 10   │         <br/>
 11   │     </mat-card-content>
 12   │ </mat-card>
───────────────────────────────────────────────────────────────────────────
──────┬────────────────────────────────────────────────────────────────────
      │ File: components/MyModule.component.ts
──────┼────────────────────────────────────────────────────────────────────
  1   │ import { Component, OnInit } from '@angular/core';
  2   │ import { ApiService } from '../services/api.service';
  3   │
  4   │ @Component({
  5   │     selector: 'lib-MyModule',
  6   │     templateUrl: './MyModule.component.html',
  7   │     styleUrls: ['./MyModule.component.css']
  8   │ })
  9   │ export class MyModuleComponent implements OnInit {
 10   │     constructor(private API: ApiService) { }
 11   │
 12   │     apiResponse = 'Press the button above to get the version.';
 13   │
 14   │     doAPIAction(): void {
 15   │         this.API.APIGet('/api/status', (response) => {
 16   │             this.apiResponse = response.versionString;
 17   │         })
 18   │     }
 19   │
 20   │     ngOnInit() {
 21   │     }
 22   │ }
───────────────────────────────────────────────────────────────────────────
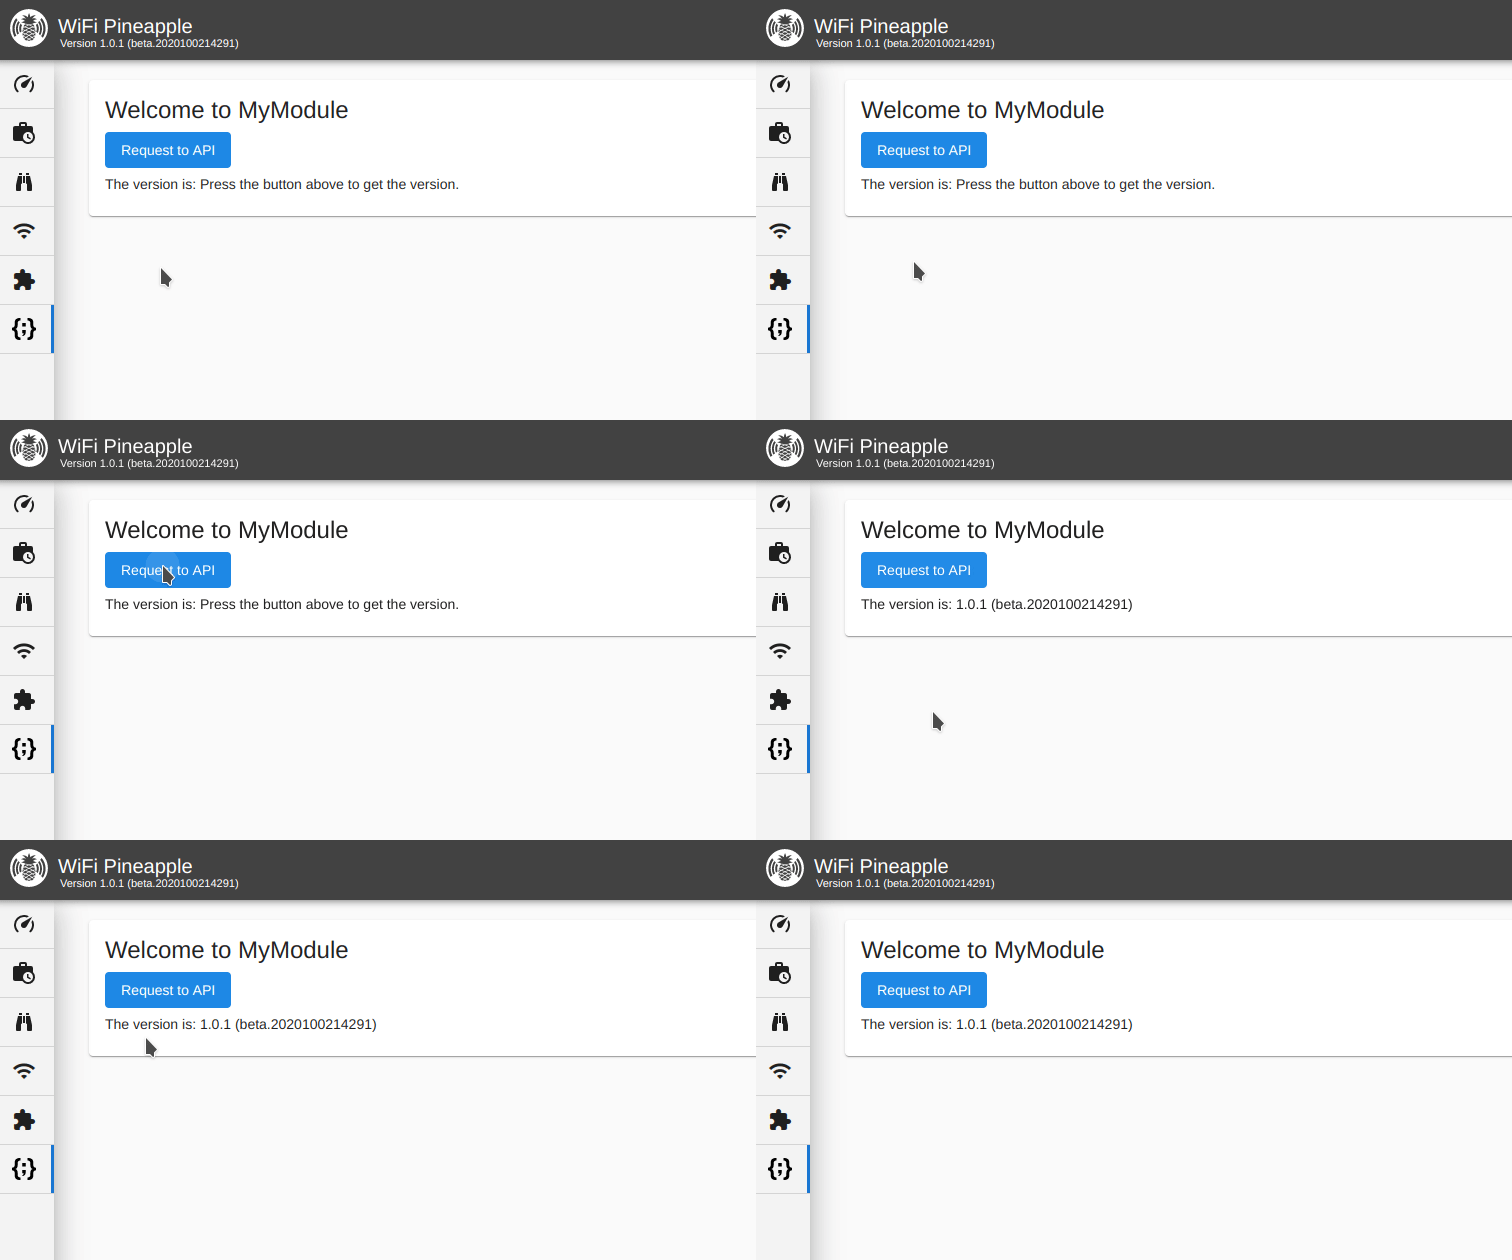
After building, packaging and uploading the module to the WiFi Pineapple’s Management UI, our module now has a button to request the version via the API.

Writing the Module Back End
Now that we have a working module front-end, we can focus on writing a custom API endpoint for our module. We’ll be using the built-in Python 3 library to write our back-end module.
As mentioned earlier in this article, the module back-end also lives inside the projects/YourModuleName/src directory. It must be named ‘module.py’.
As a basic starting point, we’ll create a module.py with a simple function to send the words ‘Hello World’ back to the module UI.
──────┬────────────────────────────────────────────────────────────────────
      │ File: module.py
──────┼────────────────────────────────────────────────────────────────────
  1   │ #!/usr/bin/env python3
  2   │
  3   │ import logging
  4   │
  5   │ from pineapple.modules import Module, Request
  6   │
  7   │ module = Module('MyModule', logging.DEBUG)
  8   │
  9   │ @module.handles_action('hello_world')
 10   │ def hello_world(request: Request):
 11   │     return 'Hello World'
 12   │
 13   │ if __name__ == '__main__':
 14   │     module.start()
───────────────────────────────────────────────────────────────────────────
Looking closer, we can see that we have registered a new module with our module’s name on line 7, and defined an action called hello_world with a function that returns ‘Hello World’ on lines 9 through 11.
We can now update our UI to use our own back-end function.
──────┬────────────────────────────────────────────────────────────────────
      │ File: components/MyModule.component.html
──────┼────────────────────────────────────────────────────────────────────
  1   │ <mat-card>
  2   │     <mat-card-title>Welcome to MyModule</mat-card-title>
  3   │     <mat-card-content>
  4   │         <button mat-flat-button color="accent"
  6   |                                (click)="doAPIAction();">
  7   │             Request to Module
  8   │         </button>
  9   │         <br/>
 10   │         <span>The API response was: </span>
 11   │         <br/>
 12   │     </mat-card-content>
 13   │ </mat-card>
───────────────────────────────────────────────────────────────────────────
──────┬────────────────────────────────────────────────────────────────────
      │ File: components/MyModule.component.ts
──────┼────────────────────────────────────────────────────────────────────
  1   │ import { Component, OnInit } from '@angular/core';
  2   │ import { ApiService } from '../services/api.service';
  3   │
  4   │ @Component({
  5   │     selector: 'lib-MyModule',
  6   │     templateUrl: './MyModule.component.html',
  7   │     styleUrls: ['./MyModule.component.css']
  8   │ })
  9   │ export class MyModuleComponent implements OnInit {
 10   │     constructor(private API: ApiService) { }
 11   │
 12   │     apiResponse = 'Press the button above to get the response.';
 13   │
 14   │     doAPIAction(): void {
 15   │         this.API.request({
 16   │             module: 'MyModule',
 17   │             action: 'hello_world',
 18   │         }, (response) => {
 19   │             this.apiResponse = response;
 20   │         })
 21   │     }
 22   │
 23   │     ngOnInit() {
 24   │     }
 25   │ }
───────────────────────────────────────────────────────────────────────────
Note in our doAPIAction() function that we are no longer using this.API.APIGet(), but instead are using this.API.request(), which takes two arguments: A JSON structure containing a minimum of module (our module’s name), action (the function we defined earlier in our Python back-end), and a callback function for the module response. Read more about the TypeScript API here.
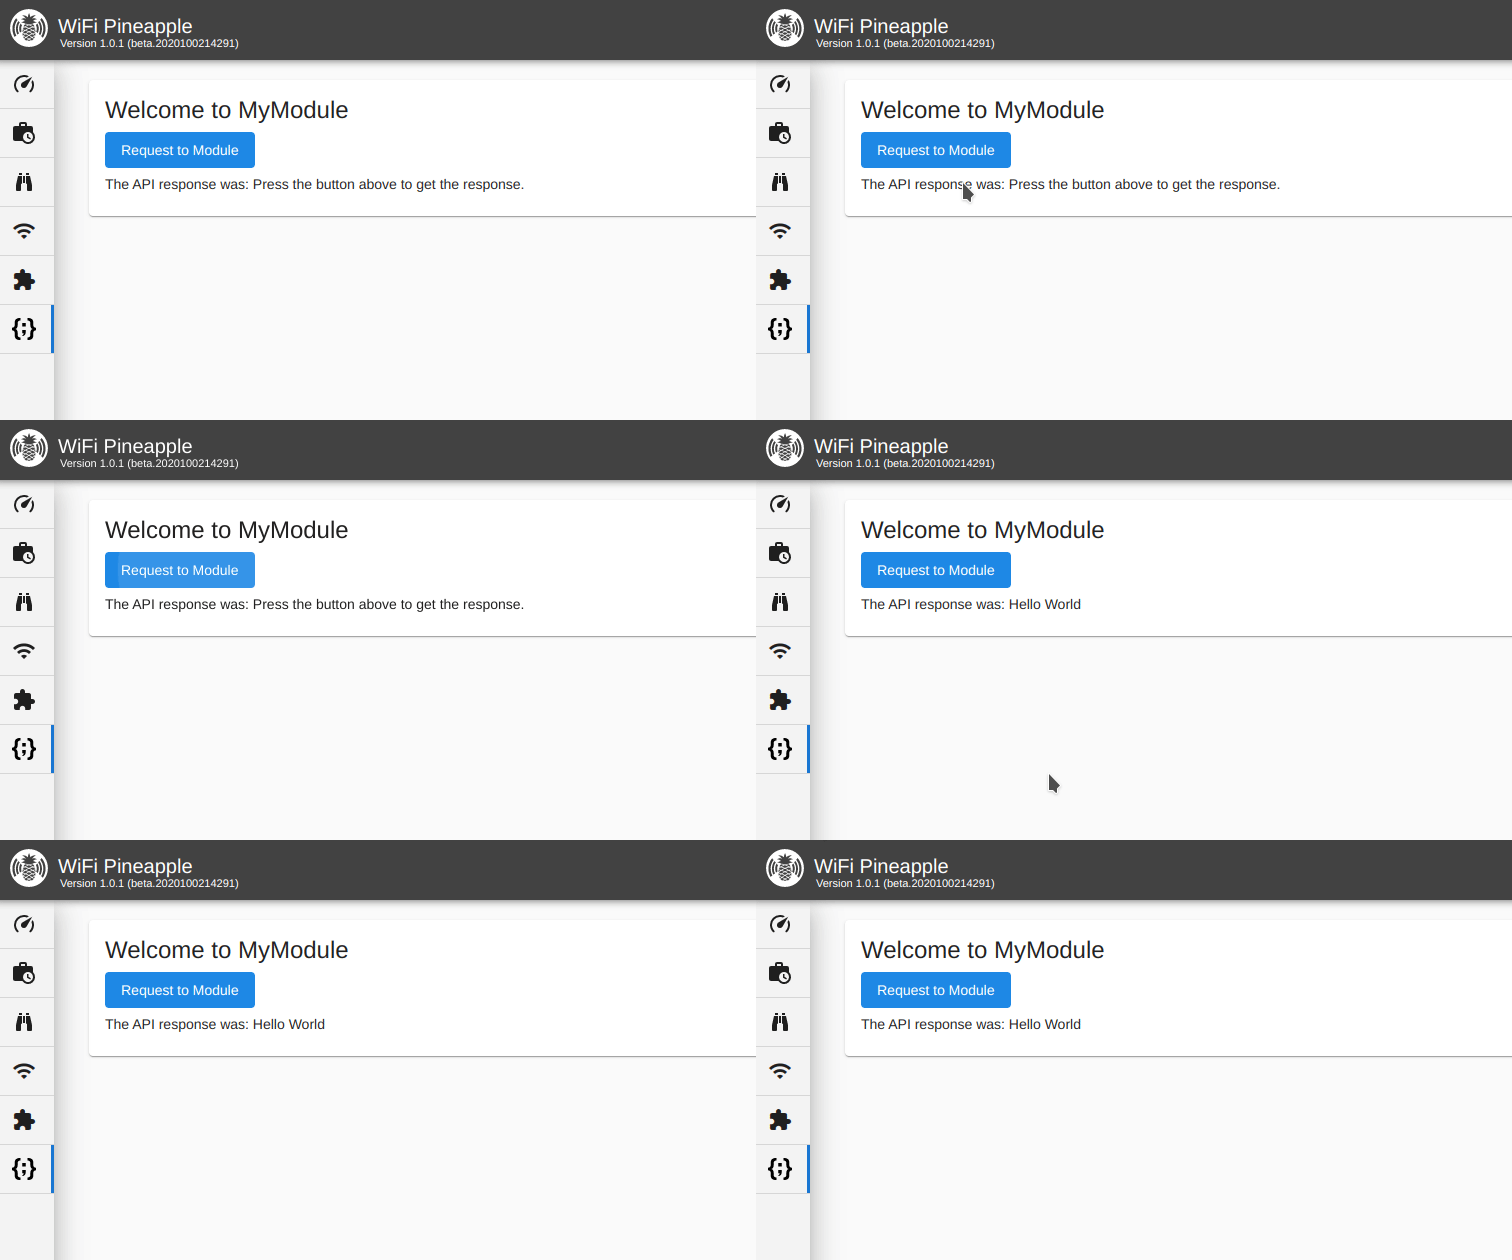
After making those changes, building, packaging and re-uploading it to the WiFi Pineapple, our module now makes a request to a custom function defined in our back-end.

The last step is getting data sent from your module’s front-end to your module’s back-end. Luckily, this is as simple as adding to the JSON structure we supply to this.API.request() and using the Python library to access it. In the next changes, we’ll add a text input to the front-end and adapt our code to use it.
──────┬───────────────────────────────────────────────────────────────────
      │ File: components/MyModule.component.html
──────┼───────────────────────────────────────────────────────────────────
  1   │ <mat-card>
  2   │     <mat-card-title>Welcome to MyModule</mat-card-title>
  3   │     <mat-card-content>
  4   │         <mat-form-field>
  5   │             <mat-label>Message to send to Module</mat-label>
  6   │             <input matInput [(ngModel)]="userInput" />
  7   │         </mat-form-field>
  8   │
  9   │         <button mat-flat-button color="accent"
 10   │                                (click)="doAPIAction();">
 11   │             Request to Module
 12   │         </button>
 13   │         <br/>
 14   │
 15   │         <span>The API response was: </span>
 16   │         <br/>
 17   │     </mat-card-content>
 18   │ </mat-card>
───────────────────────────────────────────────────────────────────────────
──────┬────────────────────────────────────────────────────────────────────
      │ File: components/MyModule.component.ts
──────┼────────────────────────────────────────────────────────────────────
  1   │ import { Component, OnInit } from '@angular/core';
  2   │ import { ApiService } from '../services/api.service';
  3   │
  4   │ @Component({
  5   │     selector: 'lib-MyModule',
  6   │     templateUrl: './MyModule.component.html',
  7   │     styleUrls: ['./MyModule.component.css']
  8   │ })
  9   │ export class MyModuleComponent implements OnInit {
 10   │     constructor(private API: ApiService) { }
 11   │
 12   │     userInput = '';
 13   │     apiResponse = 'Press the button above to get the response.';
 14   │
 15   │     doAPIAction(): void {
 16   │         this.API.request({
 17   │             module: 'MyModule',
 18   │             action: 'hello_world',
 19   │             user_input: this.userInput
 20   │         }, (response) => {
 21   │             this.apiResponse = response;
 22   │         })
 23   │     }
 24   │
 25   │     ngOnInit() {
 26   │     }
 27   │ }
───────────────────────────────────────────────────────────────────────────
Looking closer, we can see that in our HTML we’ve added some Material input and bound it using ngModel to our empty initialized variable in our TypeScript. We’ve also added the user_input property to our module request function, which we can access in our module back-end.
──────┬────────────────────────────────────────────────────────────────────
      │ File: module.py
──────┼────────────────────────────────────────────────────────────────────
  1   │ #!/usr/bin/env python3
  2   │
  3   │ import logging
  4   │
  5   │ from pineapple.modules import Module, Request
  6   │
  7   │ module = Module('MyModule', logging.DEBUG)
  8   │
  9   │ @module.handles_action('hello_world')
 10   │ def check_dependencies(request: Request):
 11   │     return 'You said: {}'.format(request.user_input)
 12   │
 13   │ if __name__ == '__main__':
 14   │     module.start()
───────────────────────────────────────────────────────────────────────────
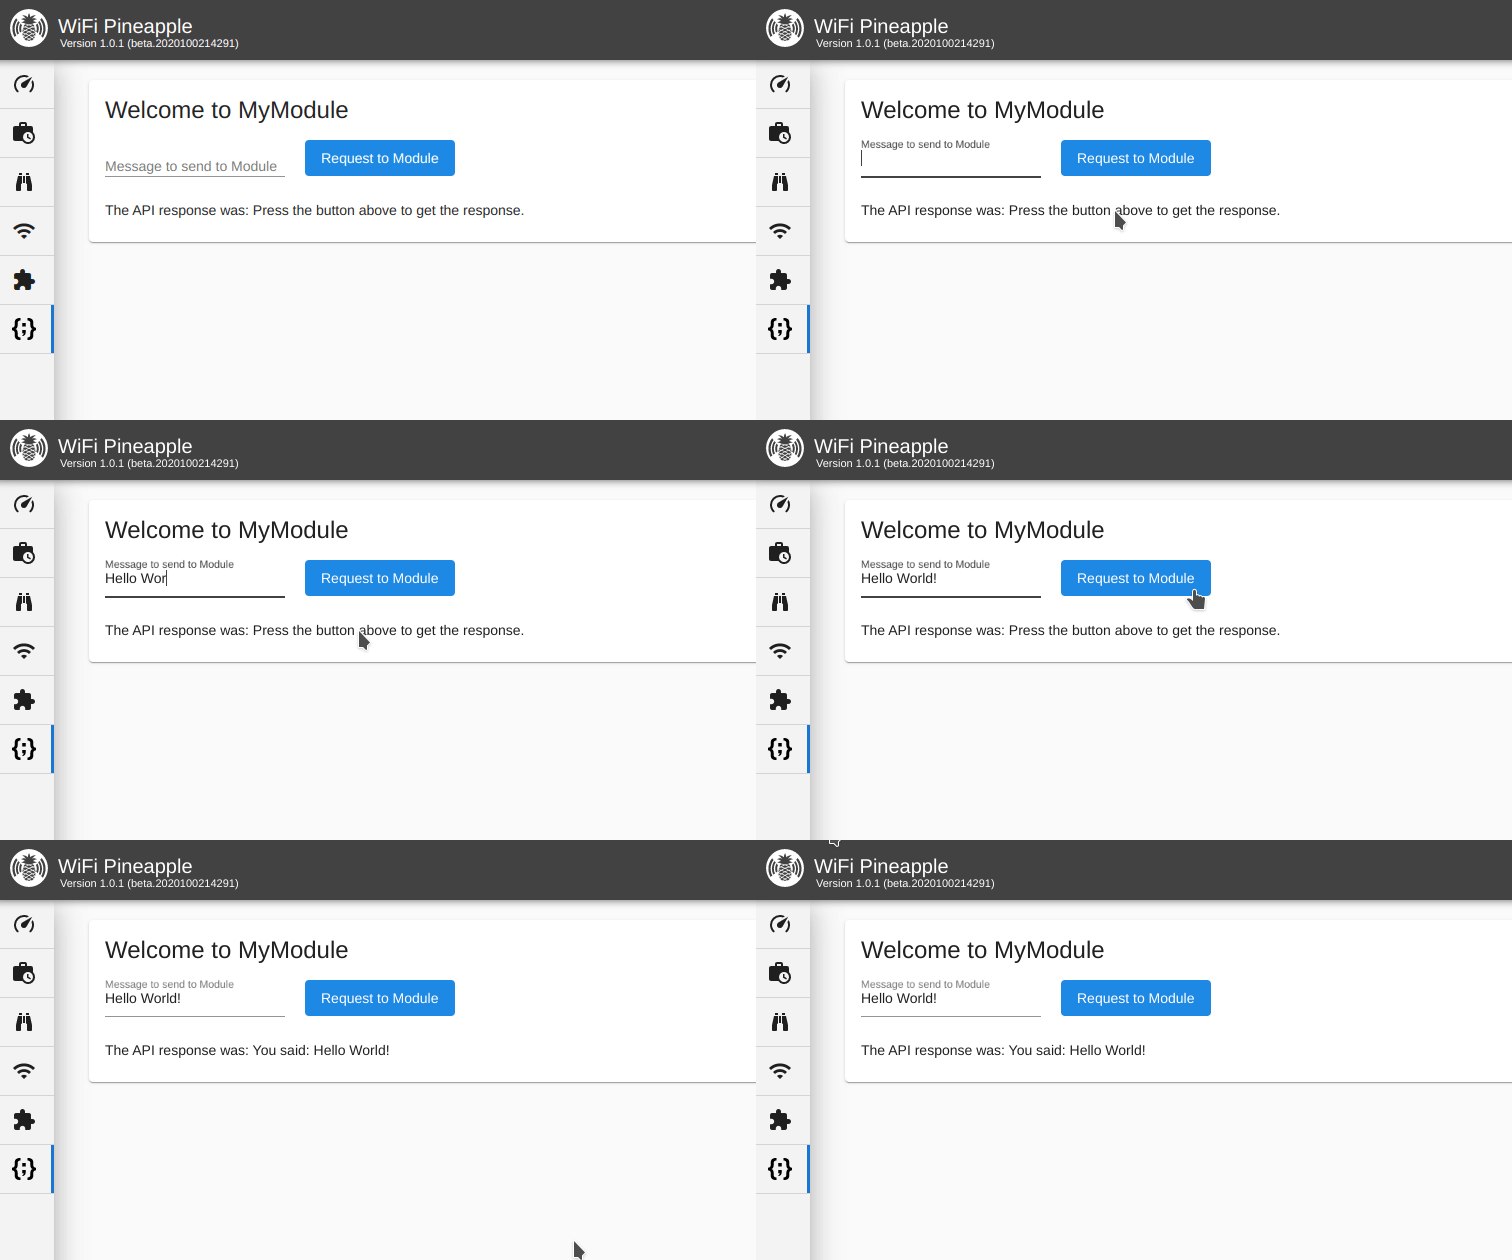
Once we build, package and re-upload this version to the WiFi Pineapple, we can test it out and make sure it’s accepting our supplied data as expected.
